Krypt Surf Technology

Monday 3 September 2018

Krypt Surf Technology Master Class with Surfmat Master Mark Thomson.

How to Repair a Surfmat

I am constantly being asked what is the best way to repair a punctured mat.
We all have accidents from time to time and there is a few little tricks to make it an easy job.
Holes and tears come in all shapes and sizes.
Here is a few common ones that we will study and use in our Master Class.

First there are pinholes theses can happen from a variety of minor incidents.
These little buggers can be hard to find sometimes.
There is a simple trick to locate these that we will discuss a later.

Second kind of holes are straight punctures normally from shells, barnacles or sharp objects.
Although they look nasty they are relatively easy to fix.


Third ones are tears and this kind of damage is nasty and can be a challenge to repair


Ok now lets get to work and get these problems fixed.
My preferred adhesives are wet-suit glue which is a rubberized contact cement, and if wet-suit glue is not available contact cement will do and for the big tears a urethane cement like Aqua Seal is ideal.


Right lets get to it.
First thing we have to do is locate the holes and hardest ones to find are the pin holes.
By simply using dish washing liquid and wetting the mat you will soon find the problem and the hole.


Blow your mat up extra hard and wet the mat with soap.
You,ll soon see bubbles where the hole is.


Once you have found the hole mark it and dry the mat off thoroughly.
Pin holes and punctures are repaired the same way.
Tears are a little different but we,ll get to them in a minute.
One of the problems with wet-suit glue is as it drys it curls your patch up.
So we need to stabilize the patch and make it a band-aid.
The best way to do this is to reverse a piece of tape and stick it down on a flat surface.


Get one of your patches which comes with your Krypt MT5 Surfmat and stick it upside down on the tape.
Smooth side down and material to material for the best mechanical bond.
You also very slightly scuff the material with some 280 grit for an even better bond.


Now apply wet-suit glue to the patch and the hole on the mat and wait for it to dry.
Make sure you massage the first layer of glue into the fabric and make sure it is wet out properly.
Apply at least 2 or 3 layers of glue to the mat and the patch.
Make sure the circumference of glue is bigger than the patch.


If the corners peel up on bigger holes like a puncture wait till the glue is dry and use a blunt object and push the curled pieces back down until they knead together flat.
Once the glue is dry carefully peel your band-aid up being careful to keep it all together and apply the patch in rolling action. This eliminates any issues with getting air under your patch.


Apply pressure to make sure there is no air under the patch and there is good adhesion.
Leave for 24hours and your good to go.


Be super carefully removing the sticky tape from the patch and don,t try and do it too early or too fast or you can rip the patch off before the glue is cured.


Now we will deal with the nasty rips and tears.
The same process applies but first we have to stabilize the the tear.
If we do not do this the exterior patch may not be able to deal with the internal pressure exerted on the tear by surfing.
We do this by placing an internal patch first.
You will need to sacrifice a piece of your carry bag for this operation.
Cut a piece of fabric that is at least an inch bigger than your tear all around.
We do not want to glue the mat together internally during this process.
The extra material allows for a bit of bleed off of the glue.


Cut 2 large patches. One for the internal repair and one for the exterior repair.
Place one of the large patch inside the tear making sure you have smooth side to the smooth internal side of the mat.
For this process we use the AQUASEAL urethane cement.
Its slow to go off so you have plenty of time to get this right.
Run a little glue around the inside of the tear and position the internal patch.


Apply tape to hold the tear in aliment and wait for 24 hours to dry.


Then repeat the first process with wet-suit glue at the beginning of the class and your mats as good as new and ready to go.


Well I hope this lesson makes life a little easier for you when it comes to fixing your mat when those unexpected surprises happens.
Instead of O NO..its ok I can fix it.

Thanks to Tom Carroll and his dust up with the rocks and barnacles at Little Avalon for the making of this lesson.

Have fun and happy surf mat sliding everyone.

Regards
Captain Krypt

Wednesday 10 August 2016

Krypt Research and Development Team

The Krypt Research and Development Team

Well the Captain was digging through his treasure chest the other day and came across these jewels from the past. 

Learning to surf should be fun. No forcing it. Let your babies work it out for them selves under there own power and discover their own love for the ocean. The Captain is the big duck and my little ducklings will follow me off the edge of the earth on any adventure. My Grandsons Jake and Spiral are growing up to be awesome little watermen. Sit back and enjoy the stoke.


Tuesday 8 March 2016

Krypt Grip Update

After one of the most amazing runs of surf in the history of the planet the Captain is final back on deck.
WELL ...the surf had to drop sooner or later.!!!!! and the Captain never misses out.
So heres the latest Krypt Grip update.
The MT5 is the lightest surfmat available so to maintain that super sensitivity to the oceans energy care should be taken when applying your grip.
Here a great example from our mate in the USA ....Ara Peterson.
The diagonal pattern maintains the flexibility of the mat with minimal weight gain.
Heres what he had to say.

I've been getting in some good time on that fresh mt5 I can confirm the grip job is working very well. I ended up using a 3m fast cure marine adhesive sealant. Still able to slide it under me forward or backward for stalling or early take offs and has excellent all around grip and its holding up so far. The design allows the nylon material to flex and move naturally and is light weight. 


Great Job Ara!
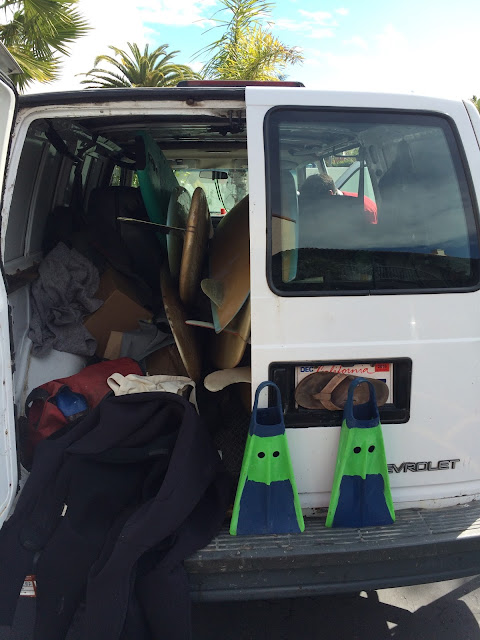
Also notice in this shot is Are,s VDUCK modification to his Voit Duck Feet swim fins.
I asked him if he could tell the difference.

I'm having a hard time deciding if I can sense to much of a difference.Possibly a more even stroke when digging in deep to the water kicking off. I like the flat ruler cut because it's more aesthetically functional, allows me to stand them up on the bumper of the the astro van!


Well I,ll leave you all to make your own mind up on that.
For me their fine just the way they are.
 
So me salty sea dogs and me marvelous mermaids, Equinox is just around the corner and if the doldrums continue you might hear a bit more from the Captain but it is cyclone season so the Captain could disappear at any time on another adventure .
. 
 

Monday 12 October 2015

Krypt Surf Technology Master Class with Surf Mat Master Mark Thomson

Custom Krypt Grip, Hip Grip, and other Designs

Customizing the grip on your surf mat is simple and easy.
Although the proprietary Dolphin Skin non skid deck of the Krypt MT5 surf mats works well, like anything, it does wear out over time.
This short and simple lesson shows how to increase the grip around your hips whilst still allowing you to slide up onto the mat.
Contrary to what others have had to say about this process being expensive, messy and difficult, this lesson shows that you can customize the non skid on your mat quickly and cleanly and using your own personal design if you want to.

Stuff You Will Need
One Ice cream Bucket
Small plastic container
One roll of masking tape
Scissors
Cleaning fluid
Clean rag
Vulkem 116 or other Sticker Flex or Marine Urethane Sealants

Preparation
Wash your mat with fresh water and allow too dry.
Inflate your mat to maximum pressure.
Clean the deck surface with Isopropyl Alcohol, Methylated Spirits or if available I use Toluene.
Toluene is nasty so wear gloves and use in a ventilated area.
Allow to dry.
Grip Design
You can now apply masking tape to the mat in the design of your choice.
Keep it simple like this lesson or be creative and inventive
If you have an artistic streak you can use cardboard to make a stencil and apply double sided tape to the stencil.


Application Of The Grip
Cut the lid of the ice cream bucket to make a small squeegee.


Squeeze a small amount of Vulkem in to the small plastic container. You don’t need much it goes a long way.


Get small amount and work it into the fabric.
Repeat the process and add more Vulkem.
Do long even stokes applying medium pressure along the design to get an even thickness of material.


Use a sponge and dab it onto the job to create texture on the Vulkem

All that remains now is to peel the tape while the Vulkem is still wet. This is where your ice cream bucket becomes the waste bucket and comes in handy for cleaning up the sticky mess
Allow to dry for 24 hours before surfing.

I prefer to use 1 inch strips as this process, if done incorrectly, can add significant weight to your mat.
With the MT5 surf mat weighing only 500gms, the designs we have chosen to use are strategically placed and add as little weight as possible whilst still providing ample grip.
For this lesson a few friends brought along their mats and attended the Master Class also.
My Series 3 mat is over a year old now and pretty thrashed so I needed more grip through the middle.
The others non skid is still in good condition and they only needed the hip grip so we made a short strip design on the rails to provide more grip allowing greater confidence in larger surf and bottom turns.
We also did one using a basic circular stencil.

Well now you know how to do it, have a bit of fun and give it go.

My old mate Waka couldn,t wait to give it a go!!!!
Being a master in floor coatings he came up with this awesome epoxy urethane sealant.
 
 
 Heres a few fine examples of Wakas handy work.


The lads are stoked on their new custom Krypts 


  Good on ya Waka!!!!
 
 
As you can see anything is possible and its only limited by your imagination.

So give it a go and we look forward to seeing your new grip designs in the water.


Sunday 24 May 2015

Small Mats and Rocker! 


by Robin Thomson


The Captain has generously taken the time to take images and provide informative material in relation to the smaller mats he designed and the role of rocker in surf mats. The first pic shows the MT2 and MT3 he had made by Dale Solomonson to his very specific instructions. It also shows the 15 4GF surf mats that MT has demolished over many years as he evolved his own ideas on surf mat design. I think I wouldn't mind living where MT does too, as the view is pretty spectacular.


The 2nd two pics provide further visual detail of the MT2 and MT3 and a sweet looking pair of mats they are too! Both are restricted breathers with the MT2 a round nose/round tail and the MT3 with a round nose/square tail. MT states that the early 4GFs were 3' 8" or 71/2" and the 5GFs of the day were 3' 8" and narrower. The MT2 and MT3 were a big step down into uncharted territory at 3' 51/2"  X 19" X 4". Both these mats were concaved with a flat rocker and it wasn't until the MT4 that rocker was introduced in to the design.


The prototype MT5 went back to a flat rocker before the production MT5 design was settled and included a further tweaked concave and reintroduced the rocker.
The MT5 was the break through design that found the perfect aspect ratio of a mat that was 2 inches shorter than those original 4GFs and 20" wide for the most efficient planing surface. You will also have noted that the MT5 has very square rear corners. This design is the best for fast speed runs and carving turns as it releases the laminar flow for the least amount of drag. On that note, he states that the MT5 is designed very specifically to suit his style of riding and the conditions that he generally rides in and that it may not suit everyone. But I have found that, like board riding, experiencing a range of mat types can only add to your mat riding knowledge and skill set.

The role of rocker in a surf mat

The  Bernoulli formula of ( L=CL  P/2  SV2)  states:
As the (V) Velocity of the fluid  increases, (P) Pressure of the fluid decreases, therefore creating (L) Lift and is the fundamental principle of all aviation..
Rocker is based on this principle in that it amplifies the fluid and creates lift by decreasing the pressure of that fluid. In the pic you can see MT flexing up the rocker so as he can attack the lip. I guess if a subtle curve already exists in the bottom of the mat then it is only going to enhance being able to carry out a move like this. To my question as to when rocker is at it's most effective MT replied "It"s always working to lift you up and out of the water to get planing and up to speed!"

Tuesday 11 November 2014

Surfmat for Kids II

The Captain never ceases to be amazed watching my guys learn to surf on a high tech  surfmat.          It instills in the young ones a true love for the ocean and surfing. Learning to surf with no leash teaches them to trust in their own ability and gives them a confidence in themselves to  get out the back and search out and find their own waves in the line up. 

There's no hurry learning to surf. Just let them discover surfing themselves and develop their skills at their own pace. Make it FUN.

Here my 6 year old grandson Jake lights up a green water hyper burn to set up the inside section.     Surf Mats harness the hidden vortex energy with in the wave and are sucked along at speed effortlessly. Jake says it tickles his belly yeah it does and the faster you go the more it tickles.


In this video shot on the Winter Solstice in 2014,  Jake gives a look at how relaxed and confident he is getting in his surfing. He shows us how much fun and joyful the simple act of sliding across a wave on a surfmat can be. Exposing them to natures energy and beauty are memories they will carry with them forever.